Showing posts with label Memory Box. Show all posts

Sunday, 7 December 2014

Winter Wonderland

No, we haven't had any snow yet, although the weather forecast is saying we might get a bit this coming week! In case the post title has misled you, let me hasten to explain that

* * * * * WINTER WONDERLAND * * * * *

is our December Challenge theme at Stamping Sensations!

We have a cracker of a prize for you this month! Once again we are sponsored by Chloe of Chloe's Creative Cards (Stamps by Chloe), who has generously donated a bumper bundle of her gorgeous stamps and accessories, and our lucky winner will also receive a bonus prize of beautiful ribbons from Crafty Ribbons.


I like this month's theme so much that I've made two cards for it! 

The first one uses a stamp from Chloe's "Snowflake Cluster" set for the background, along with a sentiment from her "Christmas Mini Messages" set.  Country Landscape die is by Memory Box, Santa's sleigh stamp by Crafty Individuals, and the snowflake die, which is by X-Cut, was a magazine freebie. The snow is made with Fluffy Puffy Stuff (love the name!) from Inkylicious, to which I've added some glitter. The background snowflakes are also glittered.

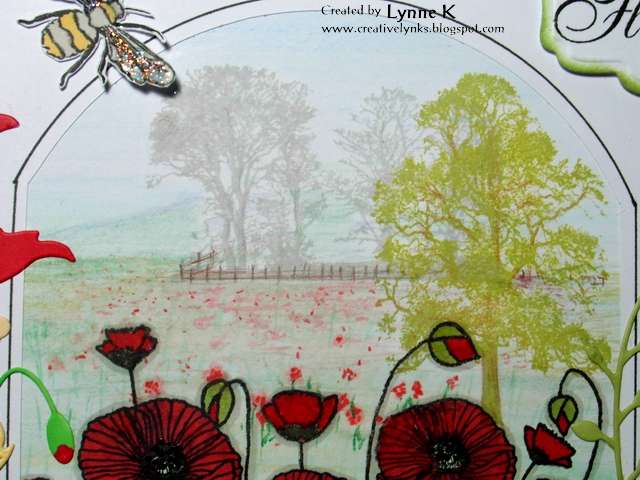
My second card is an easel card. All stamps are by Inkylicious. The tree scene (Treescape 1) in the oval is, I think, my new favourite stamp! It reminds me very much of the countryside around where I live, and it could be used to create a scene for any time of year, as it wouldn't be difficult to add some greenery to the bare branches for spring and summer, or suitable colours for autumn. However, it certainly makes a gorgeous winter scene too. 

I used my ink dusters to colour the sky, having masked off the lower part of the picture, and a moon, and added a touch of glitter glue on the snowy fields.
The deer and rabbit were stamped and cut out, and mounted with foam pads, as was the sentiment. The oval was cut with a Spellbinders die, and I cut out the sentiment panel by hand, having first punched out the little snowflakes with a Fiskars corner punch. Background papers were a freebie from Making Cards Magazine.

Here's a side view.

I think the tree scene will be featuring on many of my Christmas cards this year. And probably some spring, summer and autumn ones too!

Well, I'm really looking forward to seeing lots of  lovely Winter Wonderland scenes. Last month we had a phenomenal number of entries, over 300! Can we better that this month, I wonder?! If you should need any inspiration, have a look at the DT's stunning examples on the Challenge Blog. My terrific teamies have really outdone themselves this time, and I know they would really appreciate it if you were to visit their individual blogs too.

Thanks for looking!


Saturday, 5 July 2014

Just playing

Woo hoo, it's the school holidays! No work to prepare, nowhere I needed to go, nothing I needed to do for the time being, so I decided it was time for a play!

Recently on Pinterest I've been admiring various artworks (some of which I've pinned on my Bister and Brusho Art board) using something called Bister, or Bistre. Having never heard of it before, I had to investigate! It seems to be popular in The Netherlands, and there are some great examples using it on the Stampinback Blog. I really fancied having a go at something similar, but I don't have any Bister. Then I remembered that, quite some time ago, I bought some Brusho powder paints, although I didn't do much with them at the time. As far as I can tell, Brusho and Bister appear pretty much to be the same kind of product. I'm not quite sure whether to call the Brusho paints or inks, as they behave similarly to both.

Right, I thought, I'll have a go with the Brusho and see whether I can get similar results. The trouble was, I couldn't find them! I knew they must be somewhere in my craft room. So I spent a whole day and a half (yes really!) going through all my stuff with a fine tooth comb, so determined was I to find them. I even looked in cupboards in other rooms in the house, just in case for some strange reason they had migrated elsewhere. By last night they still hadn't turned up, but at least I now have a very tidy craft room!

Anyway, to cut a long story short, I eventually realised there was one box I hadn't looked in, one I keep under my desk. It used to house a mixture of bits and pieces, a microcosm of my stash, if you like, that I could just pick up and take with me if I was going away anywhere. Since we moved up here there are very few occasions now when that would happen, so during my last reorganisation I had put all the bits and pieces away with their fellow bits and pieces and the box underwent a change of use. And, of course, that's where I finally found the Brusho!

It's brilliant stuff. So many different ways it can be used. I won't go into them all just now, but there's lots of info here. For my first card, I sprinkled some Brusho (sparingly - it's very concentrated) over watercolour paper and lightly sprayed it with water. The powder magically turned into paint and spread out over the paper.


I overstamped  it with stamps from Art Journey, Stampinback, Lindsay Mason and Hobby Art and filled in the gap at the side with a Memory Box diecut. I used a white gel pen to add highlights to the flowers.

For the second card my method was similar, except that I used plain smooth card instead of watercolour paper and coloured just part of the card with Brusho. The interesting thing here is that I only used black Brusho. When you mix it with water to use as a paint  it comes out black, but as a powder it's a composite of different colours which separate out when you spray it or drop it on to wet paper. The butterfly and grasses are by Inkylicious. I mixed a little turquoise Brusho with water to use as a paint to colour the butterfly.

The third card uses watercolour paper again, but this time I dampened the paper first before sprinkling the Brusho on to it. I stamped the flowers and butterflies (Lavinia Stamps) and painted the flowers as above. Sentiment is by Indigo Blu. Flower border punch by X-Cut.


The fun of the sprinkled backgrounds is seeing how they turn out. No two will be the same. I guess it may be possible with practice to control it a little more, but I'm not sure I'd want to. I like the randomness of it.

I've barely yet scratched the surface of what can be done with Brusho, and I'm sure I'll be doing some more experimenting, so thanks for looking, and watch this space!

Sunday, 2 March 2014

Pink!

It isn't often that you'll see much in the way of pink from me, at least not as the dominant colour on a project, but it so happens that pink is going to feature very heavily in this month's challenge at Stamping Sensations. Our theme for March is

*****   PRETTY IN PINK   *****

As long as your creation fits our challenge rules (see them here if you need a reminder of them) you can interpret the theme however you like. Oh, but don't forget that as we are a stamping challenge, we do need to see some stamping on your artwork.

Our lovely sponsor is once again adhesive specialists Styx2Anything (though as you will see on their website they sell all sorts besides the sticky things!) who have given us a great prize, along with which the lucky winner this month will also receive some gorgeous goodies from the Stamping Sensations DT. Have a look at them on the Challenge Blog, and don't say we don't spoil you!

Anyway, here's my pink card!

The background paper is some I've had in my stash for years, ditto the braid which I've tied to the tag. The lattice diecut is from Memory Box. Unfortunately I can't credit the manufacturer of the butterfly punch as there is no ID on it so I've no idea who made it. If anyone knows, please advise me. The border and butterfly stamps are all by Chocolate Baroque. The tiny Happy Birthday on the tag was a magazine freebie.

The printed tag is from the Botanica collection by Craftwork Cards. I wanted to use it as the focal point on the card but at first it just didn't look right. Then I coloured the flower heads in pink with Promarkers and inked around the edge of the tag with pigment ink, and it was amazing the difference those little touches made. It became a part of the card instead of something just stuck on top.

Here's a close up of the tag. It's hard to tell from the photo, but the flower heads and the flourish at the bottom are foiled in silver. Very pretty.

My talented teamies have some absolutely gorgeous samples for you, so do go and check them out on the Challenge Blog, and I will look forward to see all your pretty pink projects!

Thanks for looking!

Sunday, 1 December 2013

A Free and Easy end to our Challenge year

Well, it's time for our final challenge of 2013 at Stamping Sensations. If you're like me, you'll be frantically trying to get the Christmas preparations sorted at the same time as keeping up with all the regular stuff. Anyone who has finished making all their Christmas cards by now has my ardent admiration! The rest of you will, I'm sure, be grateful that our December Challenge has the theme of

***** FREE AND EASY *****

so anything goes! If you're still on with the Christmas cards (like me!), you could show us those. If not, we'd love to see what else you've been working on lately.

As usual we've got a fabulous sponsor to help us round off the year, Visible Image, an all-British company with a fantastic range of stamps, no less than 5 sets of which have been very generously donated by them for our prize.


Anyway, on to my card. It's a Christmas one, of course, 40 down, about another 30 still to go!


I treated myself to an early Christmas present of a couple of Memory Box dies which I've had my eye on for quite some time. The one I've used here is called Tessatina Border. I cut it out of both red and green card, and then inserted the green cut-out into the space left in the red card. It was then framed with the X-cut Poinsettia Border punch. That was another new buy! I was delighted recently when The Range opened a new branch not 10 miles away from me, a small oasis in the crafting desert in which I live! Had to go and check it out, of course, and couldn't resist the Poinsettia punch. So pretty, and needn't be confined to Christmas cards!

The card was finished with some flowers cut with the Marianne Design Mini Poinsettia die set, a Spellbinders bauble diecut overstamped with a Waltzing Mouse stamp, and a sentiment also by Waltzing Mouse. The background paper was a freebie from Making Cards Magazine.


My amazing teamies have some stunning samples to inspire you with. Do go and have a look at them on the Challenge Blog. We had a brilliant response to our Christmas theme last month, and I'm sure you'll all do us proud with your entries for December. Can't wait to see them!

Now, back to the Christmas card production line.......

Sunday, 6 October 2013

Stamping Sensations October Challenge

We had some wonderful entries for our poppy photo inspiration challenge at Stamping Sensations last month, but for October we are moving from flora to fauna! Our theme for this month is

ALL CREATURES GREAT AND SMALL

Plenty of scope here, I think. Furry, feathered, scaled, creatures of land, sea or air, cute or realistic, the choices are endless.

We have a fantastic sponsor too - the well known and very popular Penny Black, who have donated a super prize.


For my sample I decided to go for something a bit different for a change and made a screen card.


 All the stamps I've used are by Penny Black, and so are the butterfly stickers. The patterned background papers are by Prima, and the flower diecuts are from Memory Box. The border punch at the top is one of my favourites and I've had it for many years, but I've no idea now where it came from. I used Woodware punches to make the little vellum flowers.


I'm sure this will be a popular theme, and I will look forward to seeing lots of lovely entries! Remember you can enter up to three times, combine with other challenges and make whatever type of project you like, as long as it follows our theme. The DT have some absolutely gorgeous samples for you, so don't forget to have a look at them on the Challenge Blog

Sunday, 1 September 2013

Poppies

We have some poppy inspiration for our September Challenge at Stamping Sensations! A field of beautiful poppies (Brenda's favourite, of course!).


We'd like you to take inspiration from the photo for your projects, so for instance you could go for the colours, the general scene, or the poppies themselves. I've gone for all of those!

First of all I made the background scene. I hand drew the field and distant hills with watercolour pencils, overstamped the trees and drew the fence. Next I drew in the distant poppies, making them slightly more defined towards the foreground.


The main poppy image was then stamped over the background picture, coloured with Promarkers to make it stand out, and the flower centres dotted in with a black gel pen.


I hand cut a frame with an arch-shaped aperture from white card, drew a black border around it and mounted it over the picture. The whole thing was mounted on to the red patterned background paper, and finally on to an 8" x 8" base card. The frame was decorated with various diecuts, a stamped bee and some little butterflies, and a sentiment. Glitter glue was added to the insects' wings.


The gorgeous poppy stamp is by our lovely sponsor for September, Chloe Endean of Chloe's Creative Cards. Her "Stamps By Chloe" range has something for everyone, including Christmas stamps and a great selection of sentiments. Chloe has very generously donated a super selection of her products worth around £50 for our lucky winner this month!


The Design Team have produced some really lovely samples for you, so do go and have a look at them on the Challenge Blog. We are looking forward to seeing all your poppy-inspired projects!

Here's what I made my card with:

Main poppy image: Poppy Border from Stamps By Chloe. Tree stamps: Crafty Individuals. Bee stamp: Tonic Studios (by Ruth Hamilton). Tiny butterfly stamp and sentiment:  Hobby Art.
Diecuts - Prim Poppy, Chloe Stem, Fuchsia Sprig, all by Memory Box. Leaves (Flourish Leaf Strip) by Cheery Lynn. Sentiment cut out with Spellbinders label die. Background paper from my stash (very old!).

Tuesday, 16 April 2013

Made A Card!

Well, that's such an unusual occurrence at the moment that I though it deserved an announcement! I've been so busy lately that I've had very little time for crafting. However, I've just got some gorgeous new Inkylicious stamps which simply had to take precedence.


First I stamped the Lattice in Versamark ink and embossed it in clear powder, then coloured over it using my Inkylicious Ink Dusters and Adirondack inks. The background paper was coloured in the same way and then overstamped with the Damask stamp. Both stamps are repeatable, which is great because you can cover any size paper with them. I cut out the lattice and the brown frame with Spellbinders Labels 8 dies. The small label with the sentiment is also by Spellbinders, and the sentiment is by Inkylicious.. Butterfly die by Cheery Lynn, poppies die (coloured with Promarkers) by Memory Box. I saw the idea for fastening the ribbon with D-rings on a blog somewhere (I think!) but unfortunately can't remember where. Happy to give credit if someone can let me know where it's due! I though it was a neat idea, but it took me a while to find D-rings small enough. Eventually got them on eB*y.


I've a couple more new stamps still waiting to be inked up. Just need some more spare time!

Sunday, 30 September 2012

Who lives in a house like this?

My grandsons came to visit today and were surprised to find a mysterious little door in the skirting board!


It hadn't been there when they were here last. Where did it lead to? Whose front door could it be?

Who lives in a house like this? Why, a House Mouse of course!

I wanted to make something different from a card for a change. I saw this idea years ago, unfortunately can't remember where now. I've been meaning to make one ever since, and finally got round to it. The boys loved it!

Papers: My Mind's Eye.
Rubber Stamps: mouse - House Mouse, butterflies - Chocolate Baroque.
Digistamps: Chair, lamp, table & picture frame from Grandma's Parlor set by Wink Wink Ink.
Chipboard twig & leaves: Crafty Individuals.
Birch Tree die: Memory Box.
Leaves die: Marianne Designs

Sunday, 19 August 2012

Still flying!

We have lots of gorgeous entries coming in for this month's Stampalot Challenge, which is "Take Flight". I thought I'd show you a few more of my butterfly cards, all using the beautiful butterfly stamps by Prickley Pear.


BP: Wild Rose Studio "Butterfly Garden" (freebie with Quick Cards Made Easy mag).
Stamps: Butterfly and sentiment by Prickley Pear. Circle design on doily by Waltzing Mouse.
Dies: Butterfly by Prickley Pear, butterfly circle by Spellbinders.
Lace from my stash. Button from Fun 2 Do, Carlisle.

Crafts shops are a bit thin on the ground up here in Dumfriesshire. One of the few things I miss about Nottingham is that there are several good shops within reasonable travelling distance of where I used to live. However,  I found the beautiful floral button (on the card above) in a lovely shop called Fun 2 Do in Carlisle. They have the most gorgeous selection of buttons, ribbons, fabrics and general crafty bits and pieces, and I've just found out they have a website and do mail order! Driving back out of Carlisle I also noticed that there is a brand new Hobbycraft store being built there, due to open very soon! Oases in the craft desert! I'm happy now!

More cards:


BP: Book 7 "Shades of Summer" by Crafty Individuals.
Stamps: Butterfly by Prickley Pear, sentiment by The Craft's Meow.
Dies: Butterfly by Prickley pear, poppy by Memory Box.


BP: Patterned paper ("Neighbourwood") by Trimcraft, plain pearlised from my stash.
Stamps: Butterfly by Prickley Pear, sentiment by Stampingallday.
Die: Butterfly by Prickley Pear.
Punch: Hearts border by Martha Stewart. 

I love this butterfly with the leaves and grasses design. Just beautiful!


BP: Patterned paper ("Neighbourwood") by Trimcraft.
Stamps: Butterfly by Prickley Pear, sentiment by Chocolate Baroque.
Dies: Butterfly by Prickley Pear, Nestabilities label by Spellbinders.
Antennae and stick-on pearls from my stash.

There's still plenty of time to enter the Stampalot Challenge, and the flight theme doesn't just mean butterflies! Interpret it however you like. There's lots of lovely inspiration from my talented teamies on the Challenge Blog, so do flutter over and take a look!


Sunday, 1 July 2012

Crafty Passions

Time for another Stampalot Challenge, and this month we want to know

What's Your Crafty Passion?

Are you mad about markers, desperate for Distress Inks, a sucker for stamping, or potty about punches? Do you have a favourite technique/colour combo/subject? Whatever you can't live without in your crafting, showcase it on your project, and tell us what it is.

My crafty passions (well, the ones I've managed to fit on my card at least!) are butterflies, Distress Inks, my Cuttlebug and resist techniques.


I stamped the butterfly (by Inkylicious, as is the sentiment) with Versamark ink to act as the resist, and then sponged over the background with the Spring limited edition Distress Inks (love those colours!) The diecut butterfly is made with two dies by Memory Box, and the border is from the Spellbinders Parisian Accents set.


The prize this month won't disappoint. An eclectic mix of gorgeous goodies with which to feed your crafty passions, generously donated as ever by Sir and Lady Stampalot who are definitely passionate about their craft.


Do pop over to the Challenge Blog and check out the DT's fab samples. We look forward to seeing yours!

Sunday, 4 March 2012

Challenged to inspire!

Something a little different for this month's Stampalot Challenge. Brenda sent all the DT members two kits, the brief being to come up with something using the materials in each kit. There were slight variations in the papers and ribbons (although they were all from the same family of items) but each member's kits were substantially the same, so it is fascinating to see how different are the things we made. As an added twist, you will only get to see one project from each of us today, but you will be able to see the second batch of DT work on 18th March, when we will also be sharing a bit of exciting news with you!

Anyway, you obviously want to know what the challenge actually is for you this month! It's simply

                         * Take Inspiration*

We want you to take your inspiration from any of the DT's pieces of work or the kit itself. You can make anything you like and choose where you take your inspiration from........... perhaps some of the kit colours, pearls and swirls, or maybe one of the DT card designs and go with your own colours. All we ask is that you remember to tell us in your post where you took your inspiration from and of course follow the rules at the top of the Challenge Blog.

The first kit we are showing is called "Pearls and Swirls". This is the kit I received. Details of it are on the Challenge Blog. (I inked the edges of the base card before I remembered to take the photo!)


And this is the card I made from it.


I stamped Hero Arts "Old French Writing" stamp over the background paper, and used Memory Box dies to cut the butterfly, and punches for the flowers. The little dots at the top were cut with an ordinary hole punch, and given a bit of dimension by shaping them with an embossing tool.


The prize for this month is........


......... being carefully selected by Janice right now! But you know it will be fabulous, as always!

So go and take a look at the inspiring work by the rest of the team on the Challenge Blog, and don't forget to check back on the 18th of March for Part Two!


Sunday, 5 February 2012

In The Garden

You can't see much in our garden at the moment, because it's covered with snow!


That is actually a colour photo! However, underneath the snow, the snowdrops are out, and the daffodil shoots are already well up. The weather since we moved up to Scotland has been quite miserable, on the whole, although we have had a few lovely days too. I doubt we have finished with winter yet, but when the spring bulbs start to appear, they always lift my spirits.

And what better theme for Stampalot's February Challenge than

IN THE GARDEN

Guaranteed to lift everyone's spirits! Here's my take on the subject.

Having rediscovered old stash when sorting out my new room, and realised the extent of it, I decided that I must try and use as much as possible! So - the background for this card is a paper napkin I've had for at least ten years. The stamped image is part of an equally old Hero Arts set, and it and the sentiment (Hobby Art) are stamped and matted on scraps. I have to confess that the butterfly and border dies are new (Memory Box - couldn't resist them) but the ribbon is old! I mounted the butterfly over a scrap of Crafty Individuals background paper which is a bit old!


The Design Team have produced some really beautiful samples this month, so do go over to the Challenge Blog and take a look. And the prize is just as stunning - the most gorgeous selection of garden-themed goodies!
I can't wait to see the entries this month. I'm sure this will be a very popular theme.