There are many examples of flower pounding about on the 'net, and they're all beautiful! I've been meaning to have a go at it for ages and never got round to it, but when I found out it could be done with the Cuttlebug, I was determined to try it! I won't go into all the details as there are lots of tutorials available, including a good one
here (google Cuttlebug & flower pounding for more), but I found I got the best results using a good quality watercolour paper. Thinner papers didn't work so well.
One of the great things about the technique is that it is so quick and easy! Since moving to our new house, we haven't had chance to do much with the garden yet, but there are plenty of wild flowers growing in it! I wouldn't dream of picking wild flowers in the wild, as it were, but I think it's ok if they're from your own garden. Most people would call them weeds there, I guess! Anyway, before I picked them, I photographed them, so that I could use the photos on my cards along with the pounded papers. Here are the results.
Ivy Leaved Toadflax
Red Campion
Cow Parsley
Common Wood Sorrel
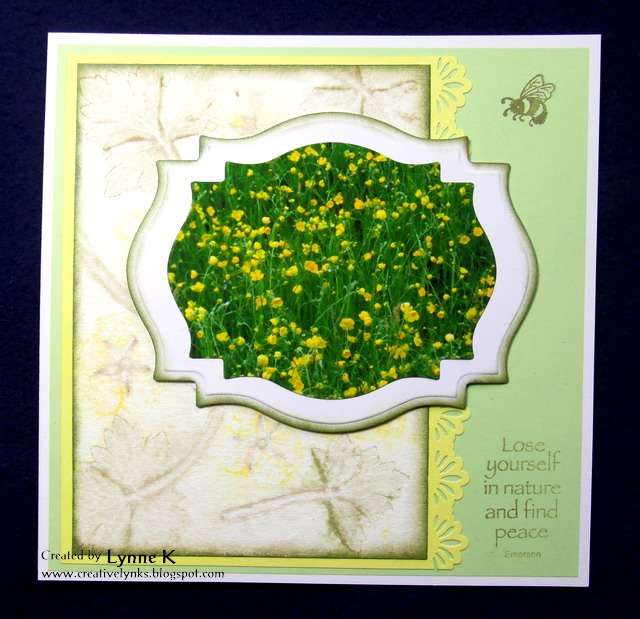
Buttercups
(This pic was of a nearby field, though the flowers I used were from the garden. We haven't got that many!)
And my favourite, Germander Speedwell
Supplies used on the cards: The pounded papers for backgrounds, Nestabilities frames and labels, Fiskars border punch, small butterfly punch by Martha Stewart, medium butterfly punch unknown, large butterfly Memory Box dies (two dies), bee stamp by Hobby Art, sentiments by Hobby Art, Paula Pascual, Paper Artsy, and Inkylicious (part of stamp), Prima flowers, ribbons and rainbow paper from my stash.
Can't wait to do some more, but after weeks of gorgeous weather, it's now windy, grey, cold and very wet, so I'll have to wait until the flowers dry up a bit! We've had some lovely evening walks while the weather's been good. About a week ago we went across the fields opposite our house, and came across these characters, sitting outside the entrance to their den.

There were five altogether, some obviously young ones, and three disappeared down the hole as we approached, but these two seemed unconcerned and stayed there for a while, watching us watching them, until they too went down into the den. We used to get urban foxes in our garden at the old house, but I've never seen more than one at a time before. It was amazing to see a whole family of them together like this! The wonders of living in the countryside. We're loving it more and more. However, there are downsides. A few minutes ago the power suddenly went off. We get occasional power cuts for no apparent reason. Oh no, I thought, I'll have lost all that post I've just spent ages typing in! Fortunately Mr. Blogger had kindly saved it for me, so here it is!