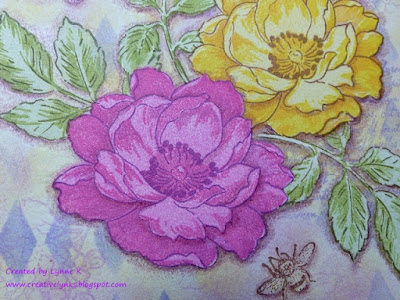
You could have knocked me down with the proverbial feather when I found out that my entry into Crafty Individuals' May Challenge had been picked by Malcolm as one of the five winners! This was my winning project (also my DT sample for Stamping Sensations May Challenge). For details of how I made it, and more photos, see my earlier blog post here.
My prize was a free stamp of my choice. I chose the beautiful Butterfly Trio Panel, which I have long admired but for some strange reason never got round to buying, so I was delighted to have the chance to add it to my collection.
The first thing I made with it was a thank you card for Jean and Malcolm.
I embossed it with copper embossing powder on to black card, diecut the corner of the card with a Sizzix/Tim Holtz die and matted it with a paper from Crafty Individuals' "Travels In Italy" background paper book. The girl image is from the Crafty Individuals A4 Glossy Sheet "Domino", mounted on to Spelbinders diecuts. The smaller diecut is also copper-embossed around the edge. Sentiment by Crafty Individuals (a freebie). Can you tell they're one of my favourite stamp companies?! Not only for their stamps, but also for all the other gorgeous bits and pieces they sell to go with them!
I am, though, still loving my Altenew stamps, particular the "Beautiful Day" set, which I have used again for a birthday card for a friend.
She asked me to put it on my blog and explain how I made it. Hmm! I think it was actually much easier to make than to describe the method! But I'll have a go!
1. Stamped the silhouette part of the flower twice and the leaf spray three times on to post-it notes and cut them out to use as masks.
2. Stamped the left hand flower (four-part stamping) and masked it.
3. Stamped the right hand flower and masked that too.
4. Stamped the leaves three times and masked them all.
5. Keeping all the masks in place, sponged the entire background with various colours of pigment inks.
6. Overstamped with the harlequin and text stamps (Cherry Pie), butterfly (Chocolate Baroque) and flower sprays (from the Altenew set). The harlequin stamp was only partially inked as I didn't want the hard edges to show.
7. Removed all masks.
8. Sighed with relief, as that's the point where you find out whether the design has worked!
9. Coloured the butterfly and added shading around it and the main flowers and leaves with pencil crayon to make them stand out a bit.
10.Sponged pigment ink around the edges of the picture to define them.
11. Mounted it on to a 6" x 6" blank card.
Phew! Definitely easier to do than to describe!
Since I wasn't able to get to the recent Stamp Magic show (see my previous post) I decided I was fully justified in cheering myself up by spending the petrol money I saved on new stamps! Thank goodness for mail order! Haven't had time to ink them up yet, but the school hols will be here in a couple of weeks so watch this space! Thanks for looking!
Showing posts with label Altenew stamps. Show all posts
Showing posts with label Altenew stamps. Show all posts
Friday, 17 June 2016
Sunday, 29 May 2016
Bits And Pieces
Just some recent projects, starting with a few cards for friends and family.
Stamps: Altenew & Inkylicious. Stencil: Crafters Workshop.
Stamps: Altenew, Crafty Individuals & Inkylicious. Stencil: Crafters Workshop.
 Stamps: Lavinia Stamps & The Craft's Meow (sentiment)

Stamps: Inkylicious & Lavinia Stamps.
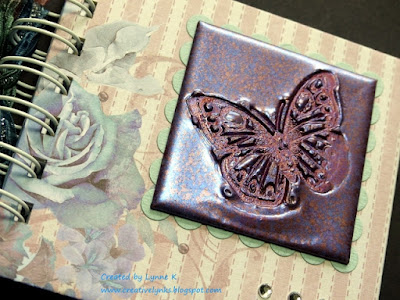
And few DT makes for Be Creative, using their stunning new embossing crystals.
Butterfly stamp on notebook: Hero Arts. Butterfly diecut on tealight holder: Frantic Stamper. Background papers: Be Creative.
Thanks for looking!
 Stamps: Lavinia Stamps & The Craft's Meow (sentiment)
Stamps: Inkylicious & Lavinia Stamps.
And few DT makes for Be Creative, using their stunning new embossing crystals.
Butterfly stamp on notebook: Hero Arts. Butterfly diecut on tealight holder: Frantic Stamper. Background papers: Be Creative.
Friday, 5 February 2016
News and New Stamps!
As a very proud member of the Be Creative Design Team, I'm delighted to announce that we now have our own Be Creative DT Blog, where we will be featuring our Be Creative projects and cards, along with hints and tips and product news. We'd love you to take a look at the new blog and become a follower. Justin has promised that when we reach 100 followers we can have a blog candy draw, so what's not to like?!
It's a close run thing, but I think my favourite Be Creative product is probably the alcohol markers, as they are such good quality and there is so much you can do with them. I've used them on the card I want to show you today.
Ever since I saw on Pinterest some stunning cards using Altenew stamps, just about all their floral sets have been on my wishlist! I managed to resist their lure for quite a while, but eventually gave in and ordered the Vintage Flowers and Painted Poppy. Couldn't wait to try them out, so here's my first card, using the Vintage Flowers.
As you will see, I need more practice in lining up the stamp layers, which I found quite tricky, but I think it's not too bad for a first attempt.
The roses and leaves were stamped with Versamagic inks in Sea Breeze, Turquoise Gem and Ocean Depth, and the small flowers with Versacolor Heliotrope, Violet and Grape. All other colouring on the card (except for the ribbon) was done with Be Creative alcohol markers.
Having completed all the stamping, I masked all the flowers and leaves. To make the speckled background, I scribbled the markers on to my glass mat and mixed the ink with Spray M Boss (Once Upon A Stamp), which has, amongst its many other uses, the effect of turning the alcohol ink into paint. I picked it up on an old toothbrush and flicked the paint on to the card, then removed the masks. I wanted the edges of the picture to be a bit darker, so I dabbed some ink directly from a marker on to a felt pad and stippled it around the edges.
The matting layers were cut from white card and coloured with the markers, as were the butterflies (Cheery Lynn dies). A little bit of sparkle was added to the small flower centres and butterflies with some Be Creative glitter glue. The border was cut with a Martha Stewart punch.
I love the versatility of the Be Creative markers, in that they can be used to co-ordinate all parts of a project. I don't know whether by accident or by design, but the two colours I used here, Pale Blue (which is actually purple!) and Peacock Green, perfectly match the ink colours Violet and Turquoise Gem! Probably coincidence, but a lucky one!
Anyway, I'm off to get some more practice lining up the layers. Think a MISTI would be very useful. Did I mention that's on my wishlist too...........?!
Subscribe to:
Posts (Atom)


