Showing posts with label Hobby Art. Show all posts

Sunday, 6 September 2020

Summer's End, and September Challenge At Stamping Sensations

 I don't know about where you are, but up here it is definitely beginning to feel like the end of summer. The temperature has dropped, leaves are beginning to turn, blackberries are ripening, the barley field opposite our house has been harvested, ploughed and resown (the local gulls have been very interested!), and the new crop is already sprouting. Over the last couple of weeks we have had just about every type of weather except snow, and including much more rain and wind than is usual for this time of year. I am hoping, though, that there will still be a good few fine days for being outside in the fresh air, whether it be on a walk or just in the garden, before the winter starts to close in.

Which brings me nicely to our theme for this month's Stamping Sensations Challenge, which is 

* * * * * THE GREAT OUTDOORS * * * * *

As the title suggests, we want to see outdoor scenes - countryside, mountains, hills, valleys, lakes, rivers etc. Our usual challenge rules apply, in particular the main element of your project must represent the theme, and must be hand stamped, or a hand coloured digital image. 

Our September winner will receive two A4 stamp sheets from the Rare Earth Illuminated Florals Collection, a prize well worth entering for. Full details are on the Stamping Sensations Challenge Blog.

My Great Outdoors scene uses the majestic stag which is part of the Stag & Hare set from Hobby Art.


I stamped and masked the stag, made the background by sponging pigment inks over hand cut hill and valley stencils, and stamped various other images to complete the scene. All stamps are by Hobby Art.

The inspiration for my card was the beautiful scenery around where I live, though I've taken a bit of artistic licence! We don't have far to travel to be out on the moors and hills. We are sometimes lucky enough to see foxes and roe deer in our immediate vicinity, but we would have to go a bit further afield to see a big red deer stag with its magnificent antlers, such as this one! 

Should you need any inspiration for your Great Outdoors projects, my teamies have plenty of stunning vistas to show you over on the Challenge Blog. We look forward to seeing your entries.

I'll leave you with a few photos that I've taken in or from my garden this week.

"You needn't bother tiptoeing, I'm just resting my eyes."

"Three wings? They're just showing off!"

"Oy, you lot, don't forget your masks!"

"It's ok, lads, I think we've got this social distancing lark sorted."


Sunday, 7 July 2019

Happy Flowers!

We have a lovely new challenge theme for you this month at Stamping Sensations! What could be more reminiscent of summer than

* * * * * THE EARTH LAUGHS IN FLOWERS * * * * *

We want to see anything floral in your creations, but please do bear in mind that flowers must be the focal point of your project and they must be stamped (hand stamped or hand coloured digi) or they will not be eligible for our prize (a fab £25 voucher from our lovely sponsors Crafty Individuals) or top three, nor will they be commented on by our DT.

I have used some Crafty Individuals stamps and papers for my project.


My base is a MDF Artboard plaque from Inkylicious, which I covered with a piece of one of the gorgeous background paper A4 sheets from the Aurora Borealis pack. This has a matching stamp (CL-493) which I stamped over a pigment ink sponged background and cut with dies from The Works for my focal point. I embellished the design with flowers from the CI-206 elements plate which I cut out and coloured with brush pens. A sentiment from Hobby Art completed the plaque. Apart from the sentiment, all stamps are by Crafty Individuals.

I think our July theme is going to be very popular, because who doesn't love flowers! So I am looking forward to seeing lots of beautiful floral entries!

Sunday, 5 August 2018

What's your favourite?

We're well into the summer holiday season now, so to keep things nice and easy our August Challenge at Stamping Sensations is an "anything goes"one but with a twist!

* * * * * ANYTHING GOES WITH YOUR FAVOURITE STAMP * * * * *

The choice of topic is yours, but your project must include your favourite stamp as its focal point! This can be an all-time or current favourite; if you are anything like me, you'll find it hard to decide! My current favourite tends to be whichever one I've just bought! However, I have several old faithful stamps which I find myself going back to again and again.

So, on my sample I've used a current favourite and some all-time favourites!


My current favourite stamp is the gorgeous "Coneflower" by Rubber Dance, who happen to be our lovely sponsors this month. They have an amazing collection of stamps and have donated a fab £25 voucher for the lucky winner.

I stamped the flowers on to a background coloured with Distress Oxide inks, stamped and cut out two extra flowers to decoupage on the front, and then embellished with my all-time favourite Hero Arts butterflies. The flowers and butterflies were coloured with Zig Clean Color markers. Backing paper is by Bee Crafty and I cut out the easel shapes with dies from The Works. Sentiment by Hobby Art.

It has been interesting to see the selection of favourites that my teamies have come up with - lots of flowers and butterflies, animals, gorgeous girls, and a touch of fantasy too! Do pop over to the Challenge Blog and have a look at them. I can't wait to see yours!

Sunday, 6 May 2018

It's only natural

We have a lovely new challenge theme for May at Stamping Sensations, and it's one of my favourites! This month we would like you to get

* * * * * CLOSE TO NATURE * * * * *

and show us your projects depicting the natural world. Lots of possibilities here, but please do remember that the main image of your design must be stamped and must fit the theme if you wish it to be considered for a prize or top 3 place.

Our sponsor for May needs no introduction, I'm sure - it's the fabulous Chocolate Baroque, who have donated one of their stunning Wild Meadow A4 Stamp Sets plus a sheet of mounting foam for the very lucky winner.

For my card I used some of the stamps from the Wild Meadow set, along with some from one of my all time favourite Chocolate Baroque sets, Spring Foliage, which features bluebells, pussy willow and alder catkins, all of which are in flower around here just now, timed perfectly for our theme!

I stamped various flowers and foliage from the two sets on the base card, stamped the bluebells and coloured them with Zig Clean Color pens, diecut them with a die from The Works, and attached them to the base card with foam pads.


 A tiny butterfly and sentiment from Hobby Art completed the design.


My amazing teamies have some absolutely beautiful samples to show you over on the Stamping Sensations Challenge Blog, and they would be so pleased if you were able to visit their personal blogs too, where you can see their projects in more detail. I'm really quite excited about our nature theme, and am hoping to see lots of lovely entries! Good luck everyone!

Sunday, 4 March 2018

Right up my street, or rather my woodland path!

One of the joys of living where I do is the abundance of local wildlife, which I love to see. So it should come as no surprise to learn that this month's challenge theme at Stamping Sensations is one of my favourites! We would like to see your creations filled with

* * * * * FOREST FRIENDS * * * * *

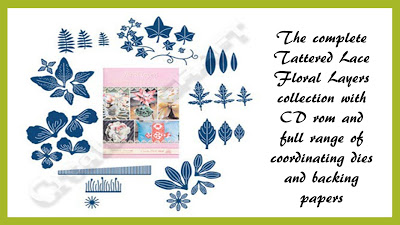
Lots of lovely creatures to choose from, but your Forest Friend/s must be the main image of your project and must be stamped (hand stamped or hand coloured digi) if you want to be in with a chance of winning one of our  fab prizes. Our sponsor for March is Tattered Lace, and here's what our lucky winner will receive! Beautiful ribbons, a storage box to keep them in, a bow maker and an inspiration book!


 I decided to make an easel card to showcase my forest friends.


I used paper masks and ink dusters to create the landscape background. The trees, leaves and creatures were stamped individually on a separate piece of card, coloured with Zig Clean Color pens and cut out. The components for the easel card were cut with stitched circle dies by The Works and then assembled. The base was covered with a gorgeous leaf print paper by Bee Crafty, and finally the creatures, leaves and sentiment were added. All stamps by Hobby Art.

The creatures depicted on my card are all to be found in the woods and fields around here, but in fact we have seen all of them on occasion without even having to leave the house! I do tend to spend quite a lot of time by the window with my camera! I could have added otter, stoat, rabbit, owl, mouse, hare and vole to my picture too, but there wasn't enough room!

I am so looking forward to seeing this month's entries! My lovely teamies have got some gorgeous examples for you over on the Challenge Blog, with oodles of the aww factor! Do go and have a look, and remember you can enter up to 3 projects. Hope you can join in, and good luck!

Sunday, 4 February 2018

Blooming Marvellous!

Time for our February Challenge at Stamping Sensations, and what better theme to brighten up this cold, gloomy month than

* * * * * ANYTHING WITH FLOWERS * * * * *

I have a feeling this is going to be a very popular topic, and of course, the scope is endless, but please do remember that the main focus of your project must be stamped and must comply with the theme (ie. your creation should be all about the flowers, not just a couple of tiny ones hiding in the background!) if you want it to be eligible for the prizes or top 3.

Our fab sponsor this month is Bee Crafty, who have given us a fantastic £25 voucher for our winner to spend in their online shop. I've used one of their stamps, the Backdrop Frames Splatter Swirl Upright Rectangle for my sample.

 I stamped it directly on to the front of the base card and cut away the inside of the frame. On a separate piece of card I stamped the tulips (Technique Tuesday), coloured them with watercolour pencils, masked them and stamped the text background (Stampin' Up). I then adhered the image behind the frame. The butterflies (Dovecraft) and sentiment (Hobby Art) are also stamped on to the base card.


I love most flowers, and tulips are a particular favourite. My daughter surprised me with this beautiful bunch the other day.

I'm looking forward to seeing lots of lovely flowers in this month's entries, tulips or not! I'm sure you'll have plenty of your own inspiration for your floral projects, but do go and look at my amazing teamies' creations as well, they're absolutely gorgeous! You'll find them here on the Challenge Blog. Let's brighten up this frosty February with some flower power!

Sunday, 3 December 2017

Winter Trees and Flowers

It's time for the final challenge of 2017 at Stamping Sensations, and our theme for December is

* * * * * WINTER TREES AND FLOWERS * * * * *

Last month's theme of one layer cards seemed to be a little too challenging for some of you, but this month we hope you will find it easier, and you can layer and embellish as much as you like!

However, please do remember that we are a stamping challenge, therefore we must see stamping as the focal point of your artwork - ie. stamping must be the central point of attention and interest.

We have a fab prize from Stix2 for our winner, with a smaller prize for second place.


I chose a winter trees stamp from Circa Design (Unmounted Stamp Company) for my main image.

The pheasants, fox and kestrel are by Hobby Art, and the sentiment is a freebie from Simply Cards & Papercraft magazine.

I used a punched circle to mask where I wanted the sun to be, and also masked the top and bottom of the card, and everywhere below the line of the hill before colouring the sky with Memento ink using ink dusters. I then reverse masked the sun and coloured that too. I removed the hill and sun masks, stamped the tree scene and added some shading to give the effect of snow. I had to extend the trunk of the tree covering the right hand side of the sun, with a fine black pen, otherwise it would have appeared suspended in mid air!  Finally I removed all other masks and stamped the fox, kestrel and sentiment. The pheasants were stamped on a separate piece of card, coloured with Zig Clean Color pens, cut out (minus a few extra lines which I didn't want to show in the picture) and glued in place.

As always, if you're not quite sure how to interpret the theme, or just need some ideas, pop over to the Challenge Blog, where my teamies have created some wonderful samples to inspire you.

The run up to Christmas is always busy (and I still have several more cards to make!) but I do hope you will be able to find time to join in the challenge. It needn't take long, or be complicated, and the closing date is not until until the 3rd of January. A bit of quiet card making time between Christmas and New Year will be the perfect antidote to all the stress of the big day!

Sunday, 5 November 2017

And panic is beginning to set in.......!

Well, there are about seven weeks to go until Christmas, and I have made the grand total of TWO Christmas cards! Don't know where the time has gone this year, but I can now understand why retired people say they wonder how they ever had time to go to work! I seem to be busier than ever, not that I'm complaining! Much better than having nothing to do!

Anyway, one of the cards I have managed to produce so far is for our November Challenge at Stamping Sensations, where our theme is

* * * * *  ONE LAYER CHRISTMAS * * * * *

We would like to see Christmas designs which are one layer only, ie. stamped directly on the base card, with no matting or layering and no die cuts or embellishments. Also, may I remind you that we are a stamping challenge, so we must see a stamped image, sentiment or quote as the focal element of your artwork. This means that stamping must be the central point of attention and interest.

For our main winner, we have a fabulous prize, this super storage collection by Tattered Lace!


I made my robin card with Hobby Art stamps. The robin, branch and leaves are from the gorgeous new "Robins" Set, which has been designed by the wonderfully talented Janie Burnett-Bleach. The little background scene uses stamps from various Hobby Art Scene-it sets.

NB. The black edge around my photo is not part of the card! It is definitely one layer, I promise! I tend to photograph my cards against a dark surface so that they stand out better and the background of the photo doesn't detract from the card.

To build up the picture I used no less than 18 masks! The robin was stamped and masked first, followed by the branch, then the background scene and finally the leaves, with each mask left in place until the final leaf was stamped. Then the nerve-wracking bit - removing all the masks to reveal the finished picture. That's when you find out if it has worked or not!
Fortunately, I think it did! A fiddly technique (lots of cutting out of masks!) but worth it. I completed the design by adding some shading with pencils around the various elements to define them, and giving the berries highlights with a white gel pen.

If you've never tried one layer cards  before, don't be afraid to have a go. They can be as simple or as complicated as you wish! Masking does not have to be involved! A clean and simple design would work equally well. You could add some subtle colouring or go for a monochrome effect.

My teamies have risen magnificently to the challenge, and you can see their beautiful results on the Challenge Blog. I look forward to seeing yours!

Sunday, 18 June 2017

Poppies & Daisies

Couldn't resist the beautiful new set from Hobby Art: Floral Mix, designed by Janie Burnett-Bleach.

To make this card, I first stamped the flowers with Versafine ink (in Smokey Gray as I didn't want harsh black outlines), masking as necessary, and then, with all masks still in place, coloured the background by sponging with pigment inks. Next the leaves were stamped, after which I removed the masks. The flowers and leaves were coloured with watercolour pencils, and the bee and dragonflies were stamped and coloured. Finally, I added some shading around the images and some glitter glue to the insects' wings. All stamps by Hobby Art.


Our garden is full of poppies just now, so I didn't have far to look for inspiration when making my card. The poppy flowers only last a day; by evening all the petals will have fallen off, but next morning there will be as many if not more new flowers. Gorgeous!


They will be flowering for several weeks, hopefully, but then they will be gone until another year, so I think I will keep this card as a reminder of their beauty.

Thanks for looking!

Thursday, 16 March 2017

Oliver Owl

Oliver Owl flew into my craft room recently. He's the stunning new stamp from Hobby Art. Isn't he gorgeous?!


I've put him on an A5 card, so you can tell how large and imposing he is (a good 6" from the top of his head to the tip of his tail). The detail in his feathers is amazing. I coloured him, the ivy leaves and the fence with watercolour pencils.The background is sponged with pigment inks. All stamps on my card are by Hobby Art.

Oliver brought with him his equally fabulous friend, who lives on a Nature Reserve, also by Hobby Art. I'll be inking him (or possibly her!) up soon!

Sunday, 5 March 2017

Close To Nature

For our March Challenge at Stamping Sensations we're staying with the natural world, but whereas last month's topic belonged to the animal kingdom, this month we're opening it up to anything nature related, with the theme

* * * * * CLOSE TO NATURE * * * * *

As usual, you may interpret this however you wish, as long as the main element of your design is hand stamped (or a hand coloured digital image) and reflects the theme. Please do check that your project fits our rules, otherwise it will not be eligible for the prize or top 3 and may not be commented on, in fairness to others who do follow the rules.

You certainly would not want to miss out on the chance of winning this month's prize, as it is a stunner!


Quite some time ago I bought the Kingfisher set by Hobby Art, and for some inexplicable reason, as it's the most gorgeous set, I hadn't got round to using it. However, it was perfect for our nature theme, and here's the card I've made with it.

I also used stamps from other Hobby Art sets to build up a scene around the main kingfisher image. I coloured the background with watercolour pencils, and the main elements with Zig Clean Color markers to make them stand out. I matted the picture with some Lawn Fawn paper, the colours of which complemented the kingfisher beautifully. All stamps by Hobby Art.

My lovely teamies have created a wonderfully diverse set of superb samples, which you can see over on the Stamping Sensations Challenge blog. Nature themes are my favourites (you probably guessed!) and I'm anticipating lots of entries for this one, especially with such a fabulous prize on offer! Can't wait to see them all!

Sunday, 6 March 2016

Celebrate Spring with Flowers!

Well, the nights are getting lighter, the daffodils are in bud, so it must nearly be spring, mustn't it?! We're still shivering in the cold up here in Scotland, there is snow on the hills all around us, but it can't be far away now, can it? One of the things I love most about spring is the appearance of all the spring flowers with their beautiful colours which chase away the gloom of winter. So what better theme for Stamping Sensations March Challenge than

* * * * * FLOWER POWER * * * * *

Anything floral is what we'd like to see, but please do remember that, being a stamping challenge, we need to see a stamped image as the focal element of your project if you want it to be eligible for the prize or a top 3 spot.

And it is a super prize this month! Making a welcome return as our sponsor is Be Creative (see all their details on the Challenge Blog), who have donated no fewer than six of their stunning top quality paper pads, and four packs of pearl and gem embellishments for the lucky winner! These really are the best quality, and the designs on all the paper pads are simply gorgeous.


I've used one of my favourite papers from the Be Creative pads for my card. I just love the colours on this design, and the roses and butterflies.

The Crafty Individuals bicycle stamp with its flower basket came to mind when I was thinking of what to put on the card, and the Be Creative bottle caps just fitted the wheels! Two Prima flowers became the spokes, with Craftwork Cards Candi as the hubs. The bicycle, Prima flowers and Candi were all coloured with Be Creative alcohol markers.

The bicycle was cut out with a Go Kreate die, and a butterfly cut from one of the Be Creative papers was added. The Hobby Art sentiment was, I thought, rather appropriate.

There's lots more inspiration over on the Challenge Blog, and I can't wait to see all your gorgeous floral creations!

Wednesday, 6 January 2016

Post Christmas play!

Now that Christmas is over, I'm being creative again with Be Creative! Been doing some more experimenting with the alcohol markers, and also tried out the Wonder Tape. The alcohol markers are not yet on the website, but in the meantime you can order them by contacting the shop directly.

My first project of 2016 was a card, on which I used the alcohol markers, a tag, background papers and the Wonder Tape.

I had some foil tape in my stash, bought originally from a DIY shop to make my grandson a Roman spear, for which it worked very well! I thought it might also work well as an embellishment for cards, and wondered whether it would take the ink from the alcohol markers, and as you can see, it did!

The foil is very thin and delicate, so the first task was to stick a length of it on to some card. I found the best way to colour it was to scribble directly on the foil with the markers (I used 3 different colours in light, medium and dark shades) and then to blend the colours by dabbing very lightly (so as not to muddy the colours) with the ink blending tool to which I had added a drop of isopropyl alcohol (you can of course use alcohol ink blending solution if you have it, but you only need a very small amount).

Having coloured the foil I then embossed it with a Cuttlebug embossing folder and stuck it with Wonder Tape to another piece of card which I had coloured with the darkest shade I'd used on the foil. I do like how you can use the pens to make everything co-ordinate. I then trimmed it down to leave a narrow border on each side. The butterflies (Cheery Lynn dies) and sentiment panel were coloured with the markers in the same way as the foil. Sentiment is by Hobby Art.

With the exception of the butterflies, which were fixed with a spot of glue from the Be Creative glue wand, everything else was adhered with the Wonder Tape, which, I have to say, is every bit as good as it is claimed to be! Very easy to use, but you need to be accurate with placing it, as once stuck, it certainly isn't going anywhere else!

For my second project of the New Year I have been back in jewellery making mode, but I'll save that for another post!


Sunday, 10 August 2014

"The Shire"

Proud Grandma alert!! My young grandson, Andrew, aged 5, saw the picture I made with my tree stamp and Brusho paints (see here) and he wanted to make one.


First he punched a circle from a post-it note to make a mask for the moon. Next  he made the Brusho background by dipping a paintbrush into the powders and tapping it over the paper where he wanted the colour. Then he sprayed water over the picture until the colours had merged to his satisfaction. He did all of that with instruction but no physical help.

Having finished his background, he compared it with mine and decided that my picture was too plain, as it only has the tree and a bird. We looked through my stamps, and he found the Hobbit Door (Lavinia Stamps) and said that he wanted his to be a picture of The Shire (from Lord of the Rings. He's a big LOTR fan!) He chose some other stamps to go with the Hobbit Door (from Lavinia, Inkylicious & Hobby Art) and decided where they all should go. I helped him to hold the stamps as he was stamping them, just to make sure that he didn't smudge the images, because it would have been a shame to spoil his lovely background, but everything else was entirely his own work. He finished by colouring the door surround and the tree with coloured pencils.

We both decided that his artwork was far superior to mine!

Saturday, 5 July 2014

Just playing

Woo hoo, it's the school holidays! No work to prepare, nowhere I needed to go, nothing I needed to do for the time being, so I decided it was time for a play!

Recently on Pinterest I've been admiring various artworks (some of which I've pinned on my Bister and Brusho Art board) using something called Bister, or Bistre. Having never heard of it before, I had to investigate! It seems to be popular in The Netherlands, and there are some great examples using it on the Stampinback Blog. I really fancied having a go at something similar, but I don't have any Bister. Then I remembered that, quite some time ago, I bought some Brusho powder paints, although I didn't do much with them at the time. As far as I can tell, Brusho and Bister appear pretty much to be the same kind of product. I'm not quite sure whether to call the Brusho paints or inks, as they behave similarly to both.

Right, I thought, I'll have a go with the Brusho and see whether I can get similar results. The trouble was, I couldn't find them! I knew they must be somewhere in my craft room. So I spent a whole day and a half (yes really!) going through all my stuff with a fine tooth comb, so determined was I to find them. I even looked in cupboards in other rooms in the house, just in case for some strange reason they had migrated elsewhere. By last night they still hadn't turned up, but at least I now have a very tidy craft room!

Anyway, to cut a long story short, I eventually realised there was one box I hadn't looked in, one I keep under my desk. It used to house a mixture of bits and pieces, a microcosm of my stash, if you like, that I could just pick up and take with me if I was going away anywhere. Since we moved up here there are very few occasions now when that would happen, so during my last reorganisation I had put all the bits and pieces away with their fellow bits and pieces and the box underwent a change of use. And, of course, that's where I finally found the Brusho!

It's brilliant stuff. So many different ways it can be used. I won't go into them all just now, but there's lots of info here. For my first card, I sprinkled some Brusho (sparingly - it's very concentrated) over watercolour paper and lightly sprayed it with water. The powder magically turned into paint and spread out over the paper.


I overstamped  it with stamps from Art Journey, Stampinback, Lindsay Mason and Hobby Art and filled in the gap at the side with a Memory Box diecut. I used a white gel pen to add highlights to the flowers.

For the second card my method was similar, except that I used plain smooth card instead of watercolour paper and coloured just part of the card with Brusho. The interesting thing here is that I only used black Brusho. When you mix it with water to use as a paint  it comes out black, but as a powder it's a composite of different colours which separate out when you spray it or drop it on to wet paper. The butterfly and grasses are by Inkylicious. I mixed a little turquoise Brusho with water to use as a paint to colour the butterfly.

The third card uses watercolour paper again, but this time I dampened the paper first before sprinkling the Brusho on to it. I stamped the flowers and butterflies (Lavinia Stamps) and painted the flowers as above. Sentiment is by Indigo Blu. Flower border punch by X-Cut.


The fun of the sprinkled backgrounds is seeing how they turn out. No two will be the same. I guess it may be possible with practice to control it a little more, but I'm not sure I'd want to. I like the randomness of it.

I've barely yet scratched the surface of what can be done with Brusho, and I'm sure I'll be doing some more experimenting, so thanks for looking, and watch this space!