Pages

Sunday, 4 December 2016

Flowers in December!


It's time for our final challenge of the year at Stamping Sensations, and what better than some bright and beautiful flowers to lighten up dark and dreary December days? Hence our theme this month is

* * * * * FLORAL FANCIES * * * * *

We want to see flowers as the focal element of your entry, and, as usual, because we are a stamping challenge the focal point must be a stamped image (hand stamped rubber or clear, or  hand coloured digi). Any type of flower is eligible, doesn't just have to be winter ones. And please note: if we do not comment on your entry it will be because it does not follow the theme, qualify under our rules, or because we are asked to sign in or provide additional data to comment. We do not want to be rude but we do want to be fair to those who do follow the rules.

Our prize this month is a superb selection of items from Sizzix, and who wouldn't be delighted to win this little lot?!


But that's not all! In the spirit of Christmas, the top 3 will also receive a surprise gift from us this month! So no excuses, get those entries in!                            
I love flowers, and couldn't possibly pick a single favourite, but tulips would certainly be high on the list. I've used the beautiful tulip stamp (A Year of Stamping Issue 2 - February) from Chocolate Baroque for my card, and coloured them with my new favourite pens, Zig Clean Color Real Brush markers, which have such gorgeously vibrant colours, making them ideal for these tulips.

I matted the image on to a Spellbinders diecut and added a couple of butterflies ("Magical Butterflies" dies by Sue Wilson).

The backing paper is some I have had in my stash for years (think it came from Lakeland when they sold craft items) and I've been hoarding it because it's so pretty! However, it was just perfect to go with the tulip image, and fortunately I had two sheets, so I still have one to keep! Sentiment is by Inkylicious.

My  talented teamies have really excelled themselves with some stunning samples for you to admire, so do go and have a look at them over on the Challenge Blog. I am so looking forward to seeing this month's entries!

We have had wonderful support for our challenges this year, so thanks very much to everyone who has entered. It has been a pleasure viewing all your beautiful projects, and we hope to see you again in the New Year.

Sunday, 6 November 2016

November Challenge at Stamping Sensations

I've been a bit quiet(er than usual!) in blogland over the past few months, having been very busy with a non-craft project which has taken up a LOT of my time! However, that is finished at last, and the realisation is dawning that Christmas is not far away and I haven't even begun to think about it yet! So it's perhaps as well that our November Challenge at Stamping Sensations has a seasonal theme, as it has ensured I have at least one Christmas card made!

This month our topic is

* * * * * CHRISTMAS GREETINGS * * * * *

We would like to see a Christmas greeting on your projects, as either the main image or an added sentiment. Also, as always, since we are a stamping challenge there must be stamping (rubber/clear or hand coloured digi) as the focal point. And please note: if we do not comment on your entry it will be because it does not follow the theme, qualify under our rules, or because we are asked to sign in or provide additional data to comment. We do not want to be rude but we do want to be fair to those who do follow the rules.

I've used the stunning Merry Christmas stamp by Inkylicious on my card.

 I  cut a circle stencil and sponged around inside the edge with pigment ink to make a frame for the sentiment. Holly corner punch and patterned paper are by Dovecraft. Poinsettia die set by Marianne Design.

Our lovely sponsor this month is Stamp Addicts, who have given us a £35 store voucher for our winner, and with the fantastic variety of products on offer, that lucky person will definitely be spoiled for choice!

Well, it's a nice and easy theme, but if you should need any inspiration, just pop over to the Challenge Blog and have a look at the beautiful creations showcased by our design team. We look forward to seeing lots of entries. Good luck everyone!

Sunday, 2 October 2016

Autumn Glory


Well, it doesn't seem five minutes since September arrived, and here we are at the start of October! This year is flying by! It means, of course, that it's time for our next challenge at Stamping Sensations, and this month we have one of my favourite themes -

* * * * * AUTUMN GLORY * * * * *

Not my favourite season of the year, as it reminds me that we are getting closer to winter (hate the cold and the long dark nights) but I do love the autumn leaves, trees and colours. So I will be hoping to see lots of those in our challenge entries. As usual, you may interpret the theme however you wish, but please do remember that stamping (rubber, clear or non-pre-coloured digi) must be the focal or predominant element of your project.

Our October sponsor is the wonderful Penny Black, and we have a fab selection of their products for our winner.


Recently I came across Andy Skinner's video showing how to do the alcohol ink float technique. Haven't used my alcohol inks for ages, so I decided to try the technique for my Autumn card. It was very easy to do!
The effect, produced on porous paper or card, is much softer than that obtained by using the inks on non-porous surfaces, and it makes lovely backgrounds. Having made mine, I stamped over it with Inkylicious leaf stamps, which I then coloured with diluted distress inks. Being water based, the DIs didn't affect the alcohol ink background. The next step was to stamp some of the flowers and the butterfly from Penny Black's "Enamor" set, which I also coloured with distress inks. The sentiment is from the same set. 

I added some shading around the leaves, flowers and butterfly with a Spectrum Noir pencil to make them stand out a bit more. The finished picture was then mounted with various layers on to a 7" x 7" card. The patterned paper is by Bo Bunny. A snippet of ribbon, a few punched leaves and a flower button were the finishing touches. I didn't look in my button box for a suitable button until after I had coloured the flowers, and it is a lucky coincidence that I just happened to have one in the same style and colour, which I'd forgotten I had!

I thoroughly enjoyed trying out the technique, and it's one I think I'll be using again. If you'd like to try it too, you can watch Andy's video tutorial here.

 My lovely teamies have some gorgeous projects to inspire you on the Challenge Blog, so do pop over and take a look, and we will look forward to seeing lots of awesome autumn entries!


Sunday, 4 September 2016

One For The Boys

Our September Challenge theme at Stamping Sensations is one I often struggle with, as I'm sure do others, so coming up with an idea for this month's sample really was a challenge! It is, of course,

* * * * * ONE FOR THE BOYS * * * * *

We would like to see projects with a masculine theme, but please do remember that we are a stamping challenge, so your entry must include stamping as the focal point if you wish to be eligible for the prize or top 3 place.

Browsing for inspiration, I just happened to come across a tutorial for a card fold I'd never seen before - the Trapeze Fold - and thought I would try it out. It  appealed to me because it has plenty of potential for decoration, and it was easy to do! The tutorial can be found on the Trimcraft website.

Having completed the fold, I covered the card with papers from Craftwork Cards and made a topper using Inkylicious ink dusters, stencil and stamps.

Here's a view showing how it stands.


 And a close up.

This month we are sponsored by Hero Arts, who have been making and selling top quality stamps and accessories for an amazing 42 years! They have given us a fabulous prize!


If, like me, you find masculine cards tricky, then just pop over to the Stamping Sensations Challenge blog, where you will find gorgeous inspiration from my talented teamies. We can't wait to see your entries!

Sunday, 7 August 2016

August at Stamping Sensations

We're keeping up our easy challenges for the summer months at Stamping Sensations, although up here in the frozen north one might dispute that it's summer! Ok, I exaggerate a bit. Not quite frozen, but a few nights lately have come close. Actually, we did have summer the other week. Just the one day. The temperature on our outside thermometer hit 30C, in the shade, but the next day it reverted to type. Since then it's been cool, grey, wet, misty, with just the odd dry and bright spell. Still, at least the midges haven't been quite so bad as usual here. Always a silver lining!

Anyway, our August Challenge couldn't be easier, since it's

* * * * * ANYTHING GOES * * * * *

So, whatever you like, with the one proviso that as we're a stamping challenge, we need to see stamping - rubber, polymer or digi (not pre-coloured) - as the focal part of your project.

I always find it quite difficult to decide what to do for an "anything goes" theme. Too much choice! So this time I thought I would close my eyes, pull out one of my stamp binders at random (I keep my stamps in A5 ring binders on shelves), and use a stamp or stamps from the first page in the binder. As luck would have it, I picked my Penny Black binder, and the first page contains the "Enamor" set which I bought some time ago but hadn't yet used. Been dying to get the stamps inked up, as they are so pretty, but hadn't had chance. Next question was how to use them.


One of my favourite techniques is to stamp with Distress Inks and colour the image by pulling the colour from the image lines with a water brush. However, this time I decided to add a twist. Instead of colouring in, I pulled the colour away from the flower image to make the background, leaving the image itself uncoloured. The butterfly and sentiment are from the same set. I mounted the picture on to a Spellbinders diecut and backed it with patterned paper by Prima. Nice and simple, job done!

Here's the finished card.

I'm hoping to see lots of gorgeous entries this month to brighten up our dull days! And with the prize on offer, there's no reason not to get busy with your projects! Our lovely sponsors for August are Foil Play, who have donated a fantastic £35 voucher to be spent in their online shop. They have a huge selection of items for your cardmaking and crafting, not just foils. What's not to like? So get those entries in and good luck everyone!

Monday, 11 July 2016

Monolith

I loved the idea of the new Visible Image monoliths and couldn't wait to order a pack, along with some of their stunning new stamps. Here's what I did with the first one.

I primed each side and the base with gesso, let it dry, then sponged with acrylic paints using a make up sponge to create landscapes. On the butterfly side I used the edge of the sponge to make some little flowers, which looked lovely. However, when it came to stamping the images, I couldn't fit in the ones I'd chosen without covering up the flowers, and I also decided the colours didn't look right, so I covered them up again with more paint!

I was aiming for the mood of each side to be different but still to complement each other, and the flowers just didn't work. The beauty of using the acrylic paint is that it was easy to get rid of them! Because the surface of the MDF became a little rough as the fibres swell a bit when painted, it was tricky to get a good stamped image, and I had to go over them in places with some ink and a paintbrush.

The large bird and tiny bird (Leave Your Fears set) are both on the one stamp, but I wanted the tiny bird to be further towards the corner, so I inked and stamped the two parts separately. I used the tiny bird on the other side as well, again to tie the two sides together. The butterflies (one stamped over the other) are from the  gorgeous new Own Kind Of Beautiful set, which is my new favourite Visible Image set! All stamps I've used are by Visible Image. To finish it off I sponged around all sides with pigment ink.

Here's a close look at each side.


I really enjoyed making my monolith. Now what to do with No. 2.........


Sunday, 3 July 2016

July Challenge at Stamping Sensations

Well, it's time for a new challenge at Stamping Sensations, and we have what I believe will be a very popular theme for you this month!

* * * * * ANYTHING GOES WITH A STAMP AND RIBBON * * * * *

Who doesn't like adding a ribbon or two to their creations?! We're sponsored by the fabulous Crafty Ribbons, who have a superb range of ribbons, buttons, lace and more for your crafting needs. They have given us a fantastic bundle of ribbons and embellishments for this month's lucky winner.


I recently acquired the gorgeous new Bigz Butterfly 1 from Inkylicious, and couldn't wait to ink it up! I stamped it on to watercolour paper and coloured it with Be Creative alcohol markers, then masked it and sponged, stamped and stencilled the background. I added some shading around the butterfly with coloured pencil to make it stand out a bit. All stamps by Inkylicious. Tim Holtz Mixed Media die used as stencil. I mounted the finished design on to the base card along with a strip of patterned paper (PDA), sheer and satin ribbons, and pearl embellishments which I coloured with the alcohol markers to match the ribbon.

The base card is 7" x 5", which gives you an idea of the size of the butterfly, which is simply stunning.

In the knowledge that people will be busy with holidays and summer activities this month we've kept the theme nice and simple, so I hope lots of you will find time to enter for a chance of winning that gorgeous prize! We look forward to seeing your projects!

Friday, 17 June 2016

More Bits & Pieces

You could have knocked me down with the proverbial feather when I found out that my entry into Crafty Individuals' May Challenge had been picked by Malcolm as one of the five winners! This was my winning project (also my DT sample for Stamping Sensations May Challenge). For details of how I made it, and more photos, see my earlier blog post here.

My  prize was a free stamp of my choice. I chose the beautiful Butterfly Trio Panel, which I have long admired but for some strange reason never got round to buying, so I was delighted to have the chance to add it to my collection.

The first thing I made with it was a thank you card for Jean and Malcolm.

I embossed it with copper embossing powder on to black card, diecut the corner of the card with a Sizzix/Tim Holtz die and matted it with a paper from Crafty Individuals' "Travels In Italy" background paper book. The girl image is from the Crafty Individuals A4 Glossy Sheet "Domino", mounted on to Spelbinders diecuts. The smaller diecut is also copper-embossed around the edge. Sentiment by Crafty Individuals (a freebie). Can you tell they're one of my favourite stamp companies?! Not only for their stamps, but also for all the other gorgeous bits and pieces they sell to go with them!

I am, though, still loving my Altenew stamps, particular the "Beautiful Day" set, which I have used again for a birthday card for a friend.

She asked me to put it on my blog and explain how I made it. Hmm! I think it was actually much easier to make than to describe the method! But I'll have a go!

1. Stamped the silhouette part of the flower twice and the leaf spray three times on to post-it notes and cut them out to use as masks.
2. Stamped the left hand flower (four-part stamping) and masked it.
3. Stamped the right hand flower and masked that too.
4. Stamped the leaves three times and masked them all.
5. Keeping all the masks in place, sponged the entire background with various colours of pigment inks.
6. Overstamped with the harlequin and text stamps (Cherry Pie), butterfly (Chocolate Baroque) and flower sprays (from the Altenew set). The harlequin stamp was only partially inked as I didn't want the hard edges to show.
7. Removed all masks.
8. Sighed with relief, as that's the point where you find out whether the design has worked!
9. Coloured the butterfly and added shading around it and the main flowers and leaves with pencil crayon to make them stand out a bit.
10.Sponged pigment ink around the edges of the picture to define them.
11. Mounted it on to a 6" x 6" blank card.
Phew! Definitely easier to do than to describe!

Since I wasn't able to get to the recent Stamp Magic show (see my previous post) I decided I was fully justified in cheering myself up by spending the petrol money I saved on new stamps! Thank goodness for mail order! Haven't had time to ink them up yet, but the school hols will be here in a couple of weeks so watch this space! Thanks for looking!


Sunday, 5 June 2016

Creature Comforts!

Well, best laid plans and all that! I should, when this post goes live, have been down at Sally's and getting ready to go with her to Doncaster for some retail therapy at our favourite show - Stamp Magic. However, a particularly nasty virus has put paid to that! I'm fortunate that I'm rarely ill with anything like this, so it's sheer bad luck that I should get it this week, and very annoying! I've had to send Sally my shopping list (thanks, Sally!) but will really miss having the chance to watch all the demos and marvel at new stuff, not to mention meeting people and soaking up the fantastic atmosphere which is the hallmark of Stamp Magic.

However, it's also time for a new challenge at Stamping Sensations, and at least I can take comfort in the fact that we have a great theme for you this month, and a truly fantastic prize! Our topic for June is

* * * * * FEATURE A CREATURE * * * * *

Plenty of scope here, but please do remember that as we are a stamping challenge, your entry must use a stamp (rubber/clear or non-pre-coloured digi) as its focal point.

We are sponsored once again by the fabulous Be Creative, who make an extensive range of innovative and exciting products for your crafting. One of their latest releases is the amazing WONDER CRYSTALS, a set of which will be included in the stash going to the very lucky winner! These extra thick embossing crystals are simply stunning, and they sold out on their recent introduction on Hochanda TV, so if you want to get your hands on some, here's your chance!

For my card, I was inspired by the beautiful heron which we see regularly by the river next to our house. The sentiment I've used (Chocolate Baroque) is particularly appropriate, because the heron will often sit for hours at a time on a tree branch which overhangs the river. Sometimes it will be preening itself, sometimes just watching......

My heron is a stamp by Inky Doodles. I've coloured him with Be Creative Alcohol Markers. He's watching over a lake scene created with Inkylicious ink dusters, masks and stamps, and Memento inks. The background paper is by Be Creative, from their Nature's Portrait 8"x 8" paper pad, which, along with all their other pads, is on special offer (half price!) at the moment.

This is always a popular theme, so I am hoping to be able to sit back, put my feet up and have lots of wonderful projects to peruse whilst I recuperate! Thanks for looking!

Sunday, 29 May 2016

Bits And Pieces

Just some recent projects, starting with a few cards for friends and family.

Stamps: Altenew & Inkylicious. Stencil: Crafters Workshop.


Stamps: Altenew, Crafty Individuals & Inkylicious. Stencil: Crafters Workshop.


Stamps: Lavinia Stamps & The Craft's Meow (sentiment)


 Stamps: Inkylicious & Lavinia Stamps.

And  few DT makes for Be Creative, using their stunning new embossing crystals.

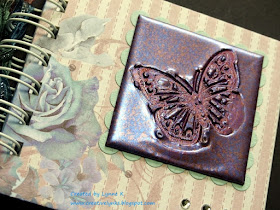
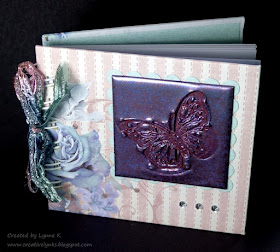
Butterfly stamp on notebook: Hero Arts. Butterfly diecut on tealight holder: Frantic Stamper. Background papers: Be Creative.


Thanks for looking!

Wednesday, 18 May 2016

A Blank Canvas!

Our current series of mid-month posts at Stamping Sensations is showcasing various techniques. Each DT member will choose either a favourite technique or one they haven't tried before. This month it's my turn, and I've gone for the latter. I've always wanted to try a mixed media canvas but haven't done so before now because I didn't know where to start. I decided this was the time to have a go!

Step 1 was to sit with the blank canvas (7" x 5") in front of me and stare at it, hoping for inspiration to strike! This took quite some time!

Eventually I decided on a nature theme, and Step 2 was to add some texture using a stencil (by Crafty Individuals) and relief paste (Colourcraft). I took the photo before the paste had dried. By the time it did so, it had sunk into the canvas a bit, and didn't stand out quite so much, but it still looked ok. I pressed on.


I added some punched leaves.

The next step was to paint it all, with acrylic paints. I also added a couple of laser-cut butterflies (Rayher).

So far, so good! I wanted to use some stamped images, but stamping on canvas is tricky. One way to get round the problem (you see - I've been doing some research!) is to stamp on to tissue paper and decoupage it on to your canvas. I stamped some images (Crafty Individuals) and  carefully tore round them. I also printed out some text on my computer.

I used diluted pva glue to decoupage the images on to the canvas. It makes the tissue paper transparent so that only the images show up. That's the theory, anyway!

Before adding the text, I sponged over it with pigment inks to tone it down a bit.

With hindsight, this would probably have been a good point to stop adding stuff, but there was a blank corner, and I felt the base needed something to hold everything in. I decided the blank corner was missing some birds, which I found on a scrap of Crafty Individuals background paper. The base received some small punched leaves, and the sides some chipboard leaves, all coloured with pigment inks.

And here's my finished canvas! Were I to do another, I would probably do some things differently, for instance some of the initial elements ended up mostly hidden, but I'm not too dissatisfied with it as a first attempt.

We  already have lots of wonderful entries for our May Challenge, for which the theme is "Anything Goes", but there's still plenty of time to enter. (Or enter again, if you have already! You can enter up to three projects.) And of course, there's the fab prize of a £35 voucher from our lovely sponsors, Crafty Individuals. I hope I might have inspired you to have a go at a mixed media canvas. The hardest part was getting started! Once I'd got over that it was easier than I thought, and although it is a long way from perfect, the main thing, I think, is to experiment and enjoy the process. I certainly did!